
What Every Online Tutor Needs
Last week, I was talking to another tutor on Skype who was considering trying online tutoring for the first time. We were discussing the benefits of online tuition and how to get started when an email notification popped up on my screen to tell me I had just made a sale of 10 one-to-one Skype lessons. Fantastic! There I was doing a separate activity unrelated to marketing or selling my lessons and I was able to secure a new student for the next 10 weeks. How was I able to do that? With something I believe every online tutor needs… a website.
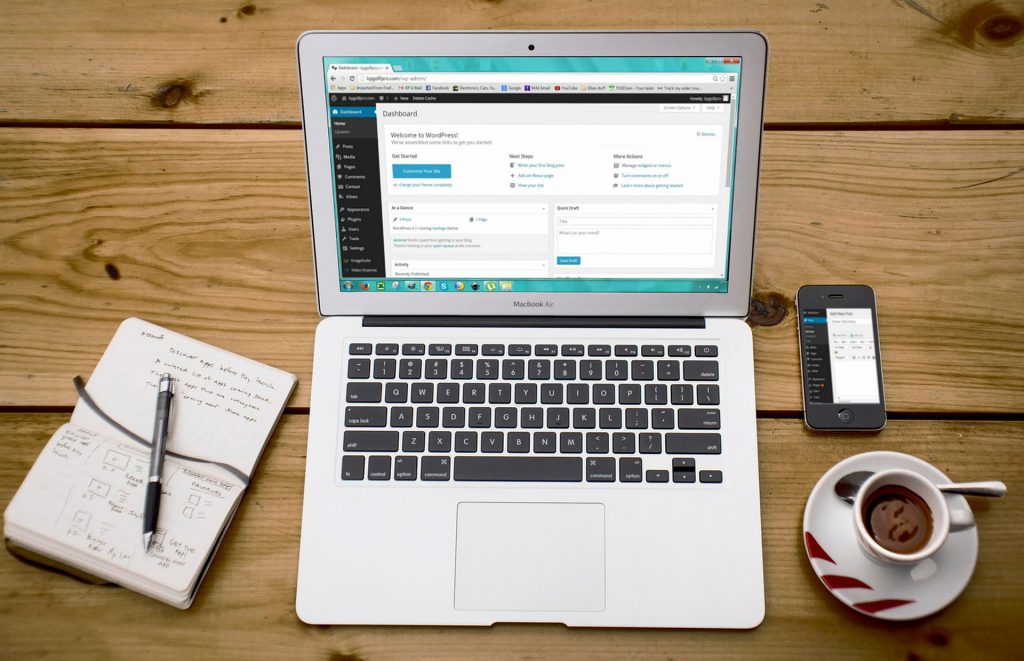
Earlier that day, I had spent about 15 minutes talking to a potential student from Switzerland who had shown some interest in having some online English lessons. As well as explaining how my lessons worked and finding out her learning needs, I also directed her to my tutoring website. I have a prices page with buy buttons for different lesson packages where students can pay online with PayPal or a credit card. After answering her questions and ending the Skype call, I carried on with my next task. She didn’t buy straight away, but that was fine. By the end of the afternoon, her money was in my account. By having a website in place, the whole process from initial contact to sale was simple, effective and time saving for both me and the student.
For the past four years, I have experienced the many benefits of having a website so I strongly recommend having your own site if you want to tutor online. This will give potential students or parents a place to find you, it will help build trust in your services and a professional looking site is a great way to help you stand out from the crowd. Here are some of the key elements that I have included on my website:
-
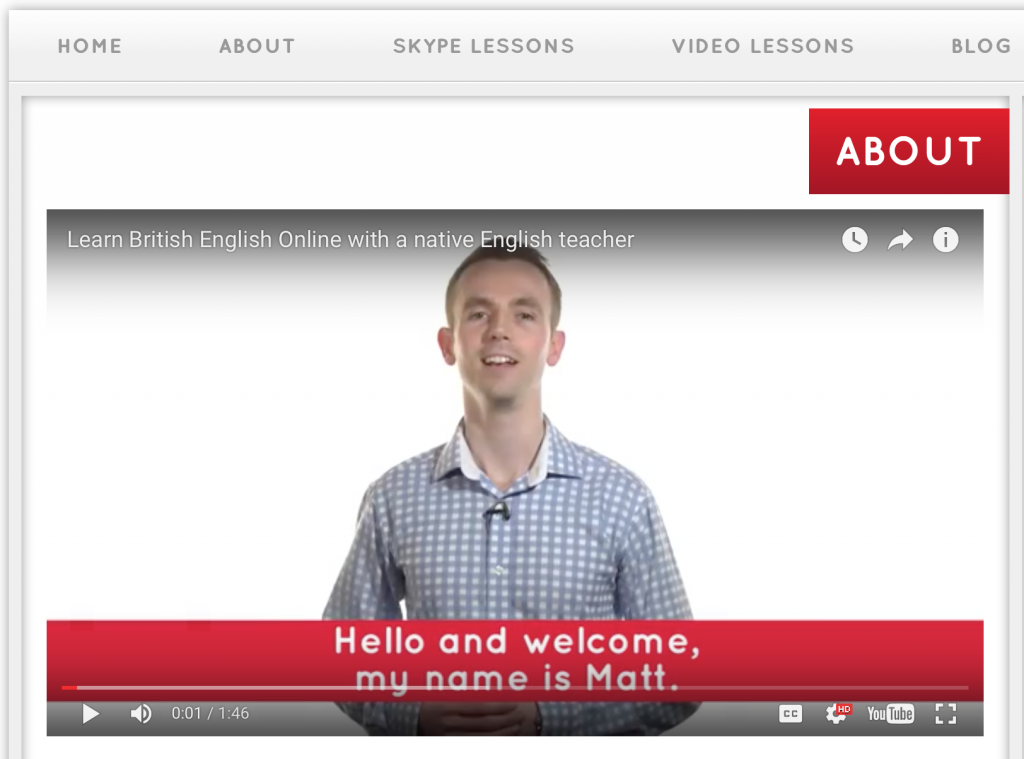
An About page so that potential students can learn more about who I am. As well as a biography, I’ve also included a video here, which explains how my lessons work and the main benefits of learning online.
-
A Prices page with a way to pay online. As well as providing information about one of the most frequently asked questions by potential students, displaying your prices reduces the number of enquiries from students with very different cost expectations. The beauty is that you’re in control of how much you charge so you can include special offers or adjust the pricing if you want, to see what works best.
-
A Blog page is a great way to offer extra value to your potential or existing students and writing articles that are relevant to the subject you tutor is an effective way to get your site ranked in search engines like Google. Regular, good quality content = higher ranking in Google which in turn makes your site more visible to customers looking for your services.
-
Testimonies from past students are a great way of building trust and promoting your lessons. In the past, I included written testimonies from my students but I’ve now started adding video testimonies, which give an extra layer of credibility and are excellent for sharing on social media.
-
A Contact page with a form that potential students can complete and submit if they are interested in lessons. This information then lands in my inbox and I reply as quickly as possible with an email to answer any questions or arrange a Skype meeting.
 Because traditional payment options such as cash and cheques are not feasible with online tuition, one of the most useful things about having your own website is that you can take online payments directly on your site. Nowadays, people around the world are getting more and more used to paying for things online. By having more than one payment option available on your site, e.g. PayPal and credit cards, students are more likely to buy lessons from you. Receiving payments via a bank transfer or BACS payment is an option (and I do this occasionally) but it’s not as easy for the student, particularly if they don’t do online banking. Bank transfers can also incur extra changes for the student, unless they live in the same country as you. My personal experience is that students (particularly international ones) are more willing to send you money via a secure, well known system like PayPal or a buy button on your website where they can pay, with a few clicks, using a debit or credit card.
The goal is to make this part of your tutoring business as easy and quick as possible for your students. If it involves extra effort, like walking to the bank to make a bank transfer, you are more likely to lose the sale. I used to only offer payment with a PayPal ‘Buy Now’ button on my site but for those that don’t already have a PayPal account, the process to set one up can cause resistance. I’ve had students wanting to buy a course of lessons but then give up after trying and failing to register with PayPal. I now use a payment processor app called Selz (referral link), which allows me to add buy buttons to my site and take payments with credit cards or PayPal. This has been a game changer for me and I’ll show you how in one of my next blog posts.
Another benefit of having your own website is that you can differentiate yourself from the competition, from others tutors. For example, many tutoring sites have hundreds of registered tutors, all competing on the same platform for students. Having your own website separates yourself from the masses and gives you more control over who sees you, how the student contacts you and how you ultimately teach those students and keep teaching them for many months and years.
But Matt, I’m not very technical and don’t know how to build a website? Won’t it take ages?
Nope. You might have noticed the website you’re reading this blog post on is very basic. In fact, at the moment, it’s only one page. I’m not a website developer and I don’t know how to write code but I was able to build this very simple website in less than an hour. Why am I telling you this? Because I want to show you that you can do this too. You can have your own website that functions well, looks professional and is the perfect place to promote and sell your lessons. If you already have a website, that’s great. High five because you’re already ahead of the game. But if you’re new to the world of website building then some of the techie language can be a bit confusing. Don’t worry, just think of building a website like building a house:

-
The plot of land = hosting. This is the land that you will build your website on. You can pay a monthly or yearly fee to a hosting company to provide you with this land but it is important that they offer good quality hosting, otherwise you may encounter problems such as slow loading or people being unable to access your website. There are a range of hosting options out there but I recommend Wealthy Affiliate because they offer hosting as part of their free or paid membership options on their reliable hosting platform.
-
Your address = domain name. Just like with a house, your website needs an address so that people can find you. The domain name for this website is smartonlinetutoring.com and there are several places online (domain registrars) where you can buy these domain names. GoDaddy and 123 Reg are popular registrars and you can expect to pay about £10 to buy and register your name for 1 year. You can also buy domain names at Wealthy Affiliate, which is handy because it makes the whole process of linking the domain to the hosting much easier and quicker.
-
The foundation = platform or Content Management System (CMS). Building your house on a firm foundation is key and the same goes for your website. A quarter of all websites globally use WordPress as their CMS because it’s powerful but user friendly. It’s also free and has a huge number of themes and plugins (like building materials) to create amazing DIY websites. Remember the hosting (your plot of land)? You’ll need this first before you can start using WordPress. I recommend laying the first foundation blocks of your WordPress site within the Wealthy Affiliate Site Builder. You can do this within a matter of minutes using a simple 4 step process.
-
Construction = theme. Now you’ve got your land, address and foundations, it’s time to build and decorate your website. When building a house you want something that looks good but is also structurally sound. To achieve the same with your site, you can choose one of many (free or paid) WordPress themes to add different pages, text, pictures, videos and anything else you want to make it attractive and functional for your students. Think of a theme like decorating the rooms in your house. To get started with this blog, I opted for one of the four preinstalled themes called Twenty Sixteen. There are 100s of themes to choose from and just like redecorating, if you want to change your theme at a later date, you can.
Phew! Time for a strong cup of tea.

As the saying goes, Rome wasn’t built in a day and to get a fully functioning tutoring website takes some time and effort. But the important thing to remember is this: You can do it. It’s totally achievable. And it’s a lot cheaper than building a house! In fact, you can get started for free and be up and running in next to no time. The initial investment of time will be well worth it in the long run and when you have a website, you have the backbone of a successful online tutoring business.
Check out next week’s post where I show you the 4 step process to building your own tutoring website.
Let me know what you think about this post by leaving a comment below and if you have any questions about online tutoring, feel free to ask.
